


Blog / Service Tips

Blog

All Service Tips GMC Vehicles Local Local Spots Driving Tips Local Events & Attractions Car Buying Tips Local Support GMC Financing Leasing Tips Local Restaurants Road Trips Carmel GMC Service Carmel Used Cars
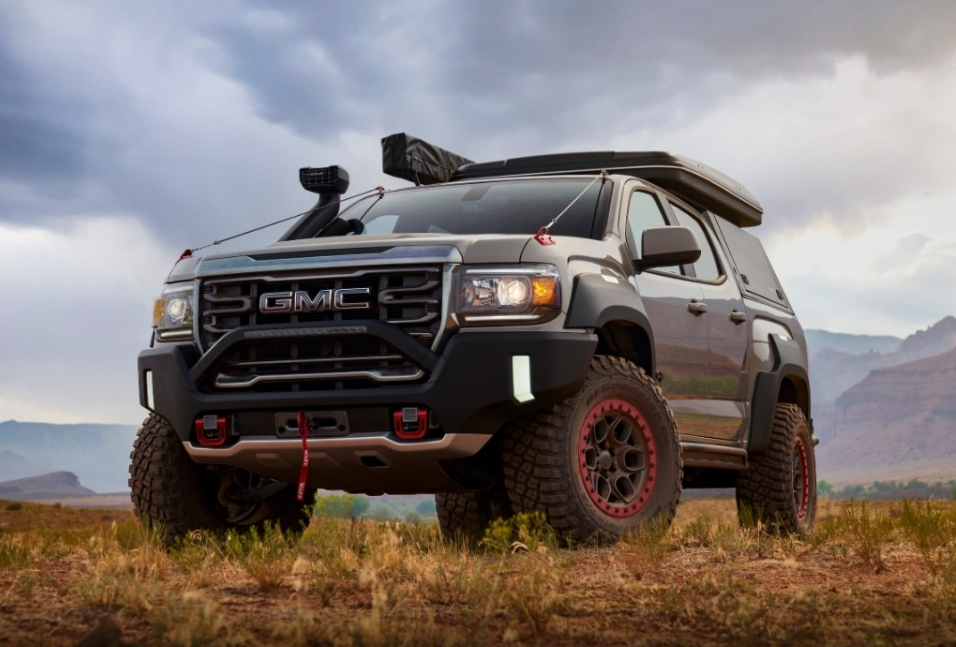
Custom GMC equipped with accessories

GMC Parts & Accessories to Customize Your Ride (Interior & Exterior)

Your GMC is already built to handle a lot, but the right upgrades can take it from capable to truly dialed-in for your life. Whether you're hauling gear through Carmel's back roads, towing a trailer on weekends, or simply wanting your cabin to feel more polished, genuine GMC parts and accessories give you a direct path to a more functional, better-looking truck. At Meadowland GMC, we help owners find exactly what fits their vehicle and their lifestyle, and we're here to make that process straightforward. more Why GMC Owners in Carmel Are Upgrading Their Vehicles with OEM Accessories Genuine GMC accessories aren't just cosmetic extras. They're engineered to integrate with your vehicle's existing systems, which matters more than most people realize. Aftermarket accessories might seem like a cost-effective shortcut, but fitment issues, warranty concerns, and inconsistent material quality are common pitfalls. OEM parts are designed to your vehicle's exact specifications, whether that's a Sierra 1500, a Terrain, or a fully loaded Denali trim. Carmel, NY gets genuinely harsh winters and sticky humid summers, and the roads here demand vehicles that are properly equipped. That's a big reason local owners invest in accessories that offer genuine protection and added capability rather than just looks. Trucks maintained and upgraded with genuine GMC parts also tend to hold their resale value better. A thorough service and upgrade history signals to future buyers that the vehicle was taken care of, which carries real weight at resale time. If you're not sure where to start, we encourage you to reach out to our service department. The team can help you identify upgrades that match how you actually use your vehicle. Protect What's Inside: Interior Upgrades and Floor Liners The inside of your truck takes a beating every day. Mud from the trails, coffee spills during the morning commute, gear tossed in the back after work, it all adds up fast. The right interior accessories slow that process down considerably. All-Weather Floor Liners and Cargo Mats All-weather floor liners are one of the most practical items in the GMC catalog. They're molded to fit each specific row of your vehicle's floor, leaving no gaps for debris to work through. Made from durable, easy-to-rinse materials, they handle mud, snow melt, and spills without degrading. That makes them especially useful around here, where you might be dealing with slushy February roads one month and muddy spring trails near Lake Mahopac a few months later. Cargo mats serve a similar purpose in the rear cargo area. Where floor liners protect your footwell, cargo mats take the abuse from groceries, tools, and sporting gear that shifts around on every drive. Together, they cover the interior surfaces most likely to show wear first. Seat Covers and Interior Trim Seat covers protect your upholstery from daily use. Pet hair, work clothes, kids in the back seat, years of general use without them will wear through even quality upholstery faster than you'd expect. Quality seat covers designed for your specific GMC model fit cleanly without bunching or slipping, and many are engineered to work around side airbags and seat controls without interference. That precision fit is where genuine OEM parts stand apart from generic options. Interior trim pieces, brushed aluminum accents, door handle covers, center console upgrades, can meaningfully change how your cabin feels. GM offers coordinated finishes across the range, so the result looks intentional rather than piecemeal. For Denali owners especially, these details help maintain the premium feel the trim was designed to deliver. Towing and Work-Ready Accessories for Everyday Demands GMC trucks are built to work, and the right accessories help you get more out of that capability. Whether you're towing a camper toward the Hudson Valley, hauling landscaping materials, or running home-improvement loads, there are parts specifically designed to support those demands. Hitch Receivers, Ball Mounts, and Towing Add-Ons A proper hitch setup starts with the right receiver class, followed by a compatible ball mount and necessary wiring connections. Genuine OEM accessories in this category are matched to your truck's tow rating and frame specifications. The Sierra 1500 with the 3.0L Duramax Turbo-Diesel offers up to 13,200 lbs of towing capacity and up to 2,240 lbs payload; the Sierra 2500 HD steps that up to 22,390 lbs. Brake controllers, safety chain loops, and wiring harness connectors round out a complete towing configuration for drivers who regularly pull significant weight. GMC's ProGrade Trailering System adds to that capability with up to 14 camera views, a transparent trailer view, and adaptive cruise control with trailering. Accessories that plug into this system are confirmed compatible through OEM design, so everything works together as intended. Bed Protection and Cargo Management Solutions A truck bed takes more abuse than almost any other part of the vehicle. Bed liners protect the metal from rust and gouges caused by shifting cargo, while bed covers and tonneau covers keep gear secure from rain, sun exposure, and theft during a run from Carmel to a job site or campground. Cargo management takes organization a step further. Toolbox mounts and tie-down anchor systems are particularly useful for contractors who carry equipment that needs to stay in place in transit, and cargo nets can stop loose items from sliding around on every turn. Exterior Accessories That Add Function and Style Exterior upgrades can transform both the look and the practicality of your truck, protecting its finish while making it more comfortable or capable day to day. Running Boards, Mud Guards, and Body Protection Running boards make it easier for passengers of all heights to get in and out of taller trucks without awkward climbing. Retractable running boards are a popular choice, tucking away when not in use for a cleaner profile. Mud guards prevent road debris and spray from pitting the paint behind your wheel wells, which matters on Carmel's gravel roads and during wet spring months. Protective films and paint protection accessories address similar concerns, shielding high-impact areas like the hood, door edges, and front bumper from chips and scratches that accumulate over time. Appearance Packages and Visual Upgrades For owners who want their GMC to stand out visually, appearance packages offer a structured way to upgrade multiple exterior elements at once. These packages typically include grille surrounds, sport-styled bumper accents, and body-color trim pieces that look deliberate rather than afterthought. The difference between a coordinated exterior update and a random assortment of parts is usually obvious, and OEM packages are designed to avoid that problem. Lighting upgrades, including LED bed lighting and upgraded exterior light assemblies, improve both looks and functional visibility. Parts in this space are designed to install cleanly without cutting or permanent modifications, which protects the vehicle's integrity and future resale flexibility. Seasonal and Outdoor Accessories for Carmel-Area Adventures Carmel sits at the edge of some genuinely beautiful New York terrain, and many GMC owners here use their trucks as a gateway to outdoor activities. Roof racks expand cargo capacity significantly, providing a secure platform for kayaks, cargo boxes, or bike mounts. That's useful for SUV owners who already have the interior packed with camping or fishing gear. Ski and snowboard carriers make winter trips more manageable, and hitch-mounted bike racks offer a versatile option across all seasons. These items are sized for specific vehicle models, roof rail configurations, and hitch classes, so fitment is never a guessing game. How to Find the Right GMC Parts That Fit Your Exact Vehicle One of the most important steps in buying parts and accessories is making sure they're built for your specific vehicle. A floor liner designed for a Sierra Crew Cab won't fit a Sierra Double Cab. A running board for a 2020 model may not mount correctly on a 2023. These details matter, and they're easy to get wrong without the right reference points. Using a VIN-based lookup is the most reliable method. GM parts by VIN searches cross-reference your vehicle's exact build data, including cab configuration, drivetrain, and installed option packages tied to that model year. This eliminates guesswork and narrows results to accessories confirmed compatible with your truck. Searching with your VIN in hand gives you a much cleaner, more accurate experience than searching by model name alone, and it's exactly the kind of lookup we do every day for our customers. Let Meadowland GMC's Parts Team Help You Get It Right At Meadowland GMC, we have access to the full range of genuine GMC parts and accessories, backed by factory-trained expertise. Our parts team can walk you through the catalog, confirm compatibility through a VIN lookup, and help you order exactly what you need, whether that's a practical interior upgrade, a full towing setup, or exterior work to sharpen your truck's appearance. You can reach us at 1952 Route 6, Carmel, New York, or call (845) 228-8465 during service hours, Monday through Friday from 8 AM to 5 PM and Saturday from 8 AM to 3 PM. Schedule a service appointment online or connect with our service department directly. Getting the right parts the first time is easier when you have a knowledgeable local team on your side.
GMC Denali Maintenance

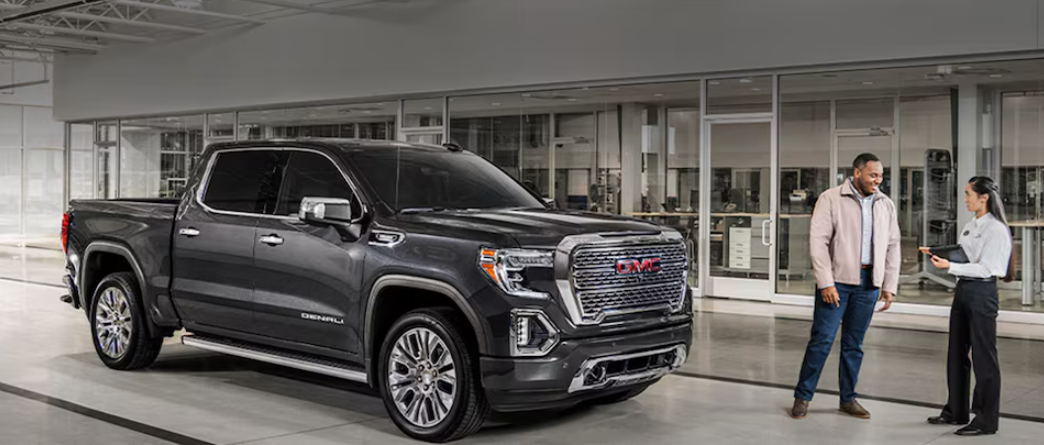
GMC Denali Maintenance: When to Replace Brakes, Filters, & Fluids

Your GMC Denali sits at the top of GMC's lineup, blending luxury touches with real capability. Keeping this premium vehicle running at its best means hitting specific maintenance intervals. Know when to replace key components and you'll protect your investment while ensuring every drive delivers that refined Denali experience. At Meadowland GMC in Carmel, NY, we help Denali owners stay on top of maintenance needs with factory-authorized service that's tailored to how you actually drive. Schedule your Denali maintenance to keep your vehicle performing at its peak. more Protecting Your Premium Driving Experience Through Proper Denali Care The sophisticated systems in your Denali demand attention at precise intervals. Stay ahead of maintenance and you prevent small issues from turning into costly repairs. You also preserve that smooth, powerful performance that makes a Denali special. Regular servicing keeps your vehicle's resale value strong and maintains warranty coverage. Being consistent with care cuts your long-term ownership costs substantially. Address wear items before they fail and you avoid the domino effect that often follows neglected maintenance. Your Denali's advanced drivetrain, braking systems, and filtration work as a team. When one system gets compromised, overall performance suffers. When to Replace Brakes on Your GMC Denali Your Denali's braking system manages serious weight while delivering confident stopping power in any condition. Brake pads and rotors endure tremendous friction during normal use, making them essential wear items that need periodic replacement. Brake Inspection and Replacement Intervals We recommend brake inspections every 7,500 miles or 12 months to catch wear before it becomes a safety issue. Most Denali brake pads need replacement somewhere between 30,000 and 70,000 miles. Your driving style heavily influences this timeline. Frequent towing, mountain driving, or aggressive braking patterns accelerate pad wear significantly. Rotors typically last longer than pads but still need attention. Our technicians often recommend rotor resurfacing or replacement when installing new pads to ensure proper contact and optimal braking performance. Warped or grooved rotors hurt braking efficiency and create vibrations that take away from your driving experience. Warning Signs Your Denali Brakes Need Service Your Denali communicates brake problems through several clear warning signs: Squealing or grinding noises during braking often mean worn pads. Grinding sounds suggest pads have worn completely, allowing metal-to-metal contact that damages rotors. Vibrations or pulsation in the brake pedal or steering wheel during braking point to warped rotors that need immediate attention. Longer stopping distances or a soft pedal feel indicate air in the brake lines or low fluid levels. Both are serious safety concerns. Dashboard brake warning light illumination means brake system sensors have detected problems requiring quick diagnosis. Pulling to one side during braking suggests uneven pad wear or a stuck caliper. Any change in braking performance deserves professional evaluation. Essential Filter Replacements for Peak Denali Performance Filters protect your Denali's engine and keep cabin air quality high. These components have a major impact on performance, fuel economy, and comfort when you maintain them properly. Engine Air Filter Maintenance Your Denali's engine processes massive amounts of air, especially under heavy acceleration or while towing. The engine air filter prevents contaminants from entering combustion chambers, protecting internal components from early wear. Replace this filter every 12,000 miles or 12 months under normal conditions. Dusty environments require more frequent replacement. We check the filter during oil changes to assess its condition visually, replacing it when dirt buildup becomes significant. You'll notice improved throttle response right after installing a fresh air filter. Cabin Air Filter Replacement The cabin air filter keeps air quality high inside your Denali, removing dust, pollen, and other airborne particles. Replace this filter every 15,000 miles or annually to maintain optimal HVAC performance. A clogged cabin filter reduces airflow, making climate control less effective. Musty odors from the vents or reduced air volume indicate the cabin filter needs replacement. Fresh cabin air significantly improves comfort during long drives, especially in heavy traffic or during allergy season around Carmel. Fluid Maintenance Schedule for Your GMC Denali Your Denali depends on various fluids to lubricate, cool, and protect its sophisticated mechanical systems. Each fluid type serves specific purposes and requires replacement at different intervals. Engine Oil and Transmission Fluid Service Modern GMC engines need oil changes every 7,500 miles or 12 months when using Genuine GM motor oil. Synthetic oil provides superior protection, especially during cold starts and high-temperature operation. The Dexos specification ensures oil meets strict requirements for modern engines. Severe driving conditions like frequent towing, extreme temperatures, or short trips may require more frequent changes. We inspect transmission fluid every 45,000 miles and recommend replacement every 30,000 to 60,000 miles, depending on your Denali's transmission type and how you use it. Regular towing or heavy hauling accelerates fluid breakdown, requiring earlier replacement. Coolant, Differential, and Transfer Case Fluids These vital fluids protect your Denali's drivetrain and temperature regulation systems. Following proper service intervals prevents expensive component damage: Fluid Type Recommended Interval Notes Coolant Inspect every 7,500 miles; replace every 100,000 miles Essential for engine temperature control in hot Carmel summers Differential Fluid Every 45,000 miles (severe duty) or 97,500 miles (normal) Critical for AWD Denali models on highway or off-road Transfer Case Fluid Inspect every 7,500 miles; replace every 45,000 miles (severe) or 97,500 miles (normal) Protects 4WD performance in variable weather Engine coolant prevents overheating while protecting against corrosion and freeze damage. Degraded coolant loses its ability to regulate temperature effectively, potentially leading to engine damage. Your Denali's differential fluid lubricates gears handling tremendous torque during acceleration and towing. Four-wheel-drive Denali models include a transfer case that requires similar attention. These often-overlooked fluids play crucial roles in drivetrain longevity. How Carmel Driving Conditions Affect Your Maintenance Timeline Driving in the Carmel area presents unique challenges that influence maintenance needs. Winter conditions with road salt accelerate corrosion on brake components and undercarriage parts. Regular inspections help identify salt damage early. Hilly terrain around Putnam County puts extra stress on brakes during descents and demands more from your engine on climbs. These conditions mean brake pads and engine fluids may need service more frequently than vehicles driven primarily on flat terrain. Stop-and-go traffic during commutes to nearby metro areas creates severe service conditions that shorten maintenance intervals. Summer humidity affects air filter life and can speed up coolant degradation. The mix of highway driving and local errands typical for area residents requires a balanced approach to maintenance scheduling. Why Certified GMC Service Matters for Your Denali Taking your Denali to certified GMC service ensures technicians specifically trained on GMC vehicles handle your maintenance. These professionals understand the detailed differences between Denali models and standard GMC trucks, from upgraded brake systems to specialized drivetrain components. Certified facilities use GM Genuine Parts designed specifically for your vehicle. These components meet exact specifications and maintain warranty coverage, unlike aftermarket alternatives that may void protections. We have access to specialized diagnostic equipment and technical information unavailable at independent shops. The certified service experience includes detailed service records that transfer with your vehicle, supporting resale value. When you bring your Denali to our service department, you receive expert recommendations tailored to your specific model year and equipment. This expertise helps you prioritize maintenance items and plan for upcoming service needs. Schedule Your Denali Maintenance at Meadowland GMC At Meadowland GMC in Carmel, our factory-trained technicians understand every aspect of Denali maintenance. We use GM Genuine Parts and follow precise manufacturer specifications for every service, from routine oil changes to complex repairs. Our service department operates Monday through Friday from 8 AM to 5 PM and Saturdays from 8 AM to 3 PM, offering convenient scheduling that fits your lifestyle. As part of the Volz Auto Group network, we have access to parts and expertise whenever you need service. Call us at (845) 228-8465 or schedule your service appointment online today. Regular maintenance keeps your Denali performing at its best while protecting your investment. Professional service prevents expensive repairs and ensures you enjoy the refined driving experience your Denali was engineered to deliver.

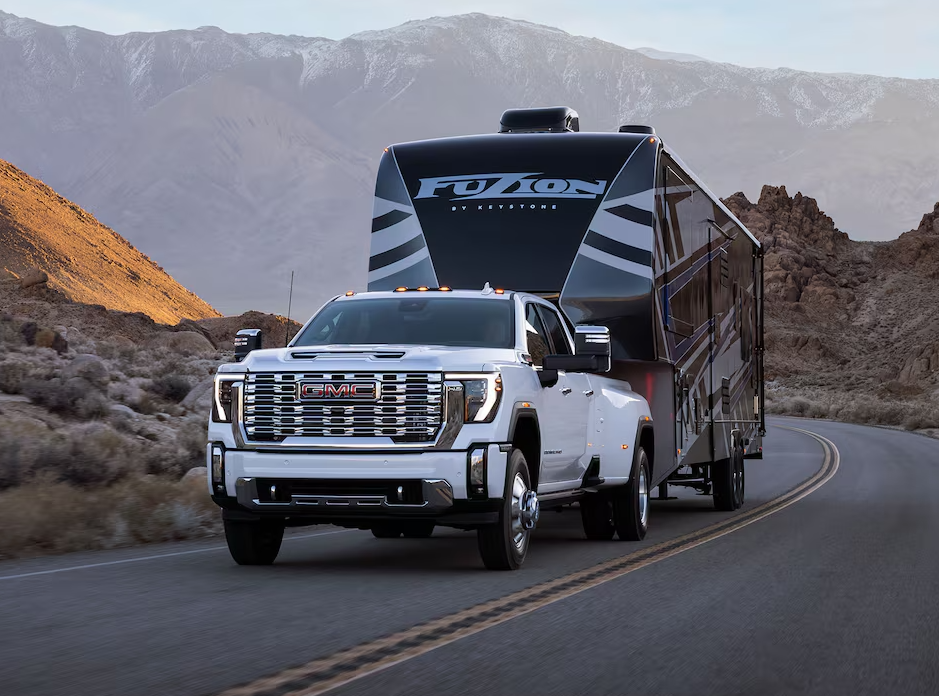
White GMC sierra 3500 towing a trailer

GMC ProGrade™ Trailering System: How to Use It and Keep It Calibrated

Towing a trailer shouldn't feel like guesswork. Whether you're hauling a boat to Lake Mahopac or towing equipment through winding Hudson Valley roads, the GMC ProGrade Trailering System transforms your truck into a confident partner. This suite of smart technologies eliminates blind spot anxiety, uncertain hitch alignment, and mysterious trailer issues by providing comprehensive visibility and real-time intelligence. Modern trailering demands precision, awareness, and real-time feedback. The ProGrade system delivers exactly that, integrating up to 14 camera views, sensors, and intelligent monitoring into a seamless experience that benefits both first-time towers and seasoned haulers. At Meadowland GMC, we regularly demonstrate these features to help northern Westchester drivers understand how the system simplifies their towing needs. more What Is the GMC ProGrade™ Trailering System? The GMC ProGrade Trailering System represents a comprehensive approach to safer, smarter towing. Rather than scattered features, it combines advanced camera networks, intelligent monitoring tools, and intuitive interfaces into one cohesive package that spots problems before they turn dangerous. This technology adapts to your specific needs through customizable profiles. Store details about each trailer you own, from your camper's weight distribution to your utility trailer's lighting setup. The In-Vehicle Trailering App remembers these specifications and automatically adjusts guidance based on which trailer you've connected. You can store profiles for up to five different trailers. Information appears on your dashboard when you need it, cameras activate at the right moments, and alerts arrive before minor issues escalate. You stay in control while technology handles the complexity. Browse our new GMC inventory to explore which configurations include the specific camera views and monitoring tools that match your towing needs Key Features That Make Towing Easier for Hudson Valley Drivers Navigating tight parking lots in Carmel or backing into campsites requires visibility that standard mirrors simply can't provide. The ProGrade system addresses this through multiple overlapping technologies that work together seamlessly. Advanced Hitch Guidance and Multi-Camera Views Hitch Guidance with Hitch View transforms trailer connection from a frustrating ordeal into a straightforward task. Visual cues show exactly where your hitch ball sits relative to the trailer coupler. Dynamic guidelines adjust as you move, providing real-time feedback that makes solo hitching actually practical. The system includes hitch lighting and auto parking brake engagement for added convenience. The multi-camera system offers up to 15 views, including the industry-first transparent trailer view that lets you see through your trailer to spot obstacles. Bed view helps you monitor cargo, while side cameras provide comprehensive visibility around your entire rig. This surround vision proves invaluable when navigating narrow driveways or crowded areas. Integrated Trailer Brake Controller and Sway Management Road conditions change quickly in the Hudson Valley. A sudden gust crossing the Bear Mountain Bridge or an unexpected lane change can induce trailer sway. The Integrated Trailer Brake Controller and Trailer Sway Control system monitors movements constantly, responding faster than human reflexes. When sway begins, the system automatically adjusts individual brakes and modifies engine power to counteract the movement. This intervention happens smoothly, stabilizing your rig without jarring corrections. Cab-adjustable brake force ensures optimal braking balance based on load weight and terrain. Real-Time Trailer Monitoring and Diagnostics Your dashboard becomes a command center displaying critical trailer information. Tire pressure and temperature readings for each trailer wheel alert you to issues before they cause blowouts. The system tracks lighting status, immediately notifying you if signals or brake lights fail. The myGMC Mobile App provides remote access to trailer status, alerts, diagnostics, and even theft notifications. This continuous monitoring prevents scenarios that ruin trips, delivering early warnings with time to address problems properly. Setting Up Your ProGrade System for Effortless Towing Proper setup transforms the ProGrade system from impressive technology into a personalized towing assistant. Taking time to configure profiles and connect supporting apps pays dividends every time you hook up a trailer. Creating and Managing Trailer Profiles Trailer profiles teach your truck everything it needs to know. Enter your trailer's length, weight, tongue weight, and tire specifications once, and the system uses this information to calibrate guidance lines, adjust brake settings, and set appropriate monitoring thresholds. Switch between profiles with a few screen taps. Each profile also stores maintenance schedules and service history. Record tire rotations, bearing repacks, and electrical checks so you never wonder when maintenance last occurred. This documentation proves especially valuable for seasonal trailers that sit unused for months. Connecting the myGMC Mobile App The myGMC app extends system functionality beyond your truck's cabin. Check trailer profiles while shopping for new trailers, comparing stored specifications against potential purchases. Receive maintenance reminders days before trips, giving you time to address issues. Pre-departure checks become more thorough with app integration. Run lighting tests, review tire pressure history, and confirm profile selection from your driveway. Remote access means you can verify everything's ready before stepping outside. Why Proper Calibration Matters for Safe, Confident Towing Calibration serves as the foundation for every ProGrade feature. When sensors accurately understand your truck's dimensions, camera angles, and trailer characteristics, the guidance they provide becomes genuinely helpful. Small calibration errors compound during complex maneuvers, turning reliable assistance into misleading information. Regular calibration ensures Trailer Sway Control responds appropriately to actual conditions. If you've added aftermarket suspension components or installed different tires, recalibration teaches the system about these changes. The technology adapts to your specific setup rather than working from generic assumptions. Camera angles shift following collision repairs or bumper replacements, rendering previous calibrations useless. Professional GMC ProGrade Trailering System service after such changes ensures all components work from the same accurate baseline. How to Keep Your ProGrade Trailering System in Top Shape We recommend dividing maintenance between tasks you handle at home and professional service to catch problems early. Sensor Checks and Software Updates You Can Do at Home Visual sensor inspections take minutes but prevent major headaches. Check that camera lenses remain clean and unobstructed, as road grime reduces image quality. Wipe lenses with microfiber cloths before trips, paying special attention after winter months when salt residue accumulates. Software updates arrive periodically with improvements and fixes. Your truck notifies you when updates are available. Staying current ensures you benefit from the latest enhancements, including refined algorithms that improve sway detection or updated camera processing. Monitor your trailer profiles for accuracy. Update weight values if you've added permanent equipment, adjust length measurements after modifications, and revise maintenance schedules based on actual usage patterns. When to Schedule Professional GMC ProGrade Trailering System Service Certain situations demand professional attention. If your truck isn't recognizing your trailer despite proper connections, the issue likely involves communication protocols requiring diagnostic equipment. Intermittent warnings that resolve temporarily but recur suggest underlying problems that home troubleshooting can't address. After any collision or impact, schedule service even if damage appears minor. Impact forces can misalign cameras, shift sensors, or damage wiring in ways that aren't immediately obvious. We have specialized calibration equipment at Meadowland GMC that verifies every component functions correctly. Annual professional inspections catch deterioration before failures occur. Wiring connections corrode over time, sensor mountings loosen from vibration, and software glitches accumulate. Our factory-trained technicians spot developing issues during routine service, addressing them during scheduled maintenance rather than emergency roadside repairs. Troubleshooting Common ProGrade Issues Before Your Next Trip Understanding common challenges helps you respond effectively when problems arise. Many issues have simple solutions, while others signal the need for professional attention. Issue Possible Cause Home Troubleshooting Steps Inaccurate hitch guidance Dirty/misaligned cameras Clean lenses, re-hitch with dynamic guidelines, check app profile Sway control not engaging Uncalibrated sensors or profile mismatch Verify trailer weight/profile, test on straight road, update software No tire pressure alerts App disconnect or low battery Reconnect myGMC app, check trailer sensors, perform pre-departure checklist Trailer light test fails Loose connections Inspect harness/plugs, run light test in app, secure chains Blind zone alerts missing Software outdated Update via app, restart system, test in traffic Quick Fixes for Connection and Camera Problems Connection recognition problems often stem from trailer wiring rather than truck system failures. Verify your trailer's seven-pin connector is clean, properly seated, and free from corrosion. Check that trailer lighting grounds properly, as poor grounds prevent reliable communication between your truck and trailer. Camera display issues frequently relate to settings rather than hardware failures. Verify camera views are enabled in your settings menu and the correct trailer profile is active. Some camera features activate only at specific speeds or conditions, so take time to familiarize yourself with triggering requirements. When to Seek Professional ProGrade System Service If your system displays erratic warnings that don't match actual conditions, recalibration often resolves the confusion. Access your system's calibration menu and run through the guided process, which typically involves driving on a straight, level road at steady speeds. Persistent problems despite troubleshooting indicate genuine system issues requiring professional diagnosis. Don't continue towing if critical safety features like Trailer Sway Control or trailer brakes fail to function correctly. Contact our service team at Meadowland GMC for guidance. Experience the ProGrade Trailering System at Meadowland GMC in Carmel, NY The ProGrade system's capabilities become clear when you actually use the cameras to guide a hitch connection or feel the sway control intervene during a test drive. We invite you to experience these features with our knowledgeable staff who understand both the technology and local towing conditions. Our factory-trained technicians handle all aspects of GMC ProGrade Trailering System service, from initial setup and calibration to ongoing maintenance and troubleshooting. We understand the system's complexities and stay updated on the latest diagnostic procedures and software releases. Located at 1952 Route 6 in Carmel, we serve Hudson Valley drivers with comprehensive sales and service support. Our service department operates Monday through Friday from 8 AM to 5 PM and Saturday from 8 AM to 3 PM. Call (845) 228-8465 to discuss your ProGrade system needs or schedule service. Visit our new trucks inventory to explore GMC vehicles equipped with this advanced technology. Understanding how to use and maintain your ProGrade system means you'll spend less time worrying about your trailer and more time enjoying what you're towing it for. Let us show you how this technology makes every trip safer and simpler.

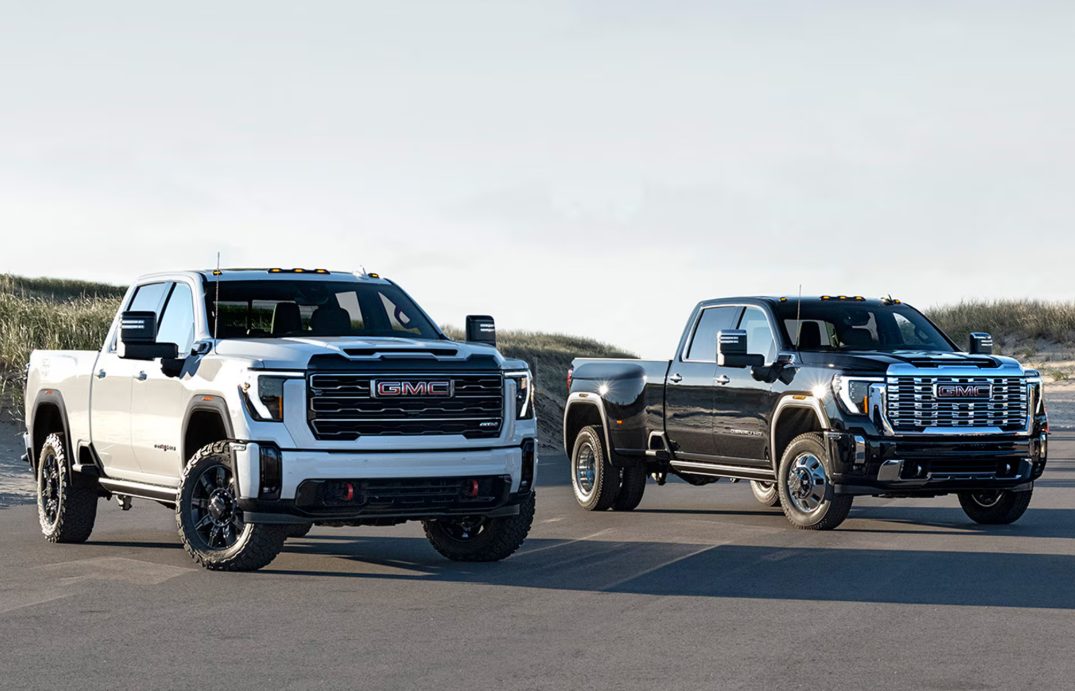
Two 2026 GMC Sierra HD trucks

GMC Sierra Duramax Diesel Service Tips: Maximizing Warranty and Longevity

Your GMC Sierra Duramax diesel isn't just a truck; it's a major investment in lasting reliability. Its powerhouse engines have earned their stripes for decades, but even the toughest diesel needs proper care. In this guide, we'll walk through expert maintenance strategies to protect your warranty and extend the life of your Duramax engine, tailored especially for truck owners in the Carmel, New York, area who count on their rigs for powerful performance every day. more Understanding Duramax Longevity: What Determines Engine Life Expectancy Diesel engines aren't built like gas ones. Thicker cast-iron blocks, heavier crankshafts, and stronger pistons are designed to handle brutal compression loads. The LBZ, produced in 2006 and 2007, is the gold standard, commonly hitting 400,000 miles with basic maintenance. In 2025, the Sierra 1500's 3.0L Duramax has a 10-speed automatic transmission and can tow up to 13,200 pounds, while Sierra Heavy Duty models offer a 6.6L Duramax that can pull up to 36,000 pounds when properly equipped. Thanks to its sturdy construction, a well-maintained GMC Duramax diesel engine can easily reach hundreds of thousands of miles. Factory-Recommended Duramax Maintenance Schedule for 2025 Sticking to factory service intervals is your best defense against premature wear and warranty headaches. GMC officially recommends servicing your truck every 7,500 miles or once yearly, whichever comes first, including an oil change and tire rotation. More extensive checks should occur every 22,500 miles or two years, including a diesel exhaust fluid (DEF) system inspection and fuel filter changes. Knowing the difference between severe duty and normal driving matters. Pulling heavy trailers, hauling loads, climbing steep hills, or making long highway runs all count as severe duty, and these conditions demand more frequent Duramax service. Your truck's oil life monitor tracks your driving patterns, but if you're regularly working your truck hard in the Carmel area, dealing with winter weather and rough terrain, you'll want to become familiar with the complete maintenance schedule to keep your truck running at its best year-round. Critical Service Components That Maximize Duramax Longevity Oil is your engine's lifeblood, so make sure to always use the correct type. For example, the 3.0L Duramax in the Sierra 1500 needs exactly 7 quarts of Dexos D 0W-20 synthetic oil, GM's specific formula for optimal cold starts and fuel efficiency. This protects your engine during Carmel's frigid winters while maintaining proper thickness when hot. If you have a high-mileage truck, it will benefit from occasional oil analysis to catch any problems early. Your CP4.2 injection pump demands serious attention, as pump failure can spray metal particles throughout your fuel system, destroying injectors, lines, rails, and tanks. Total repair bills can be extremely expensive. The pump's design is sensitive to ultralow sulfur diesel, water contamination, and fuel debris, so you should change your truck's fuel filters sooner than 22,500 miles if you drive in dirty conditions. It's good practice to check the air filters at every Duramax oil change interval and replace them by 45,000 miles, or sooner in dusty conditions. Cooling systems need fresh coolant every five years or 150,000 miles, plus regular hose and radiator checks. The DEF system requires quality diesel exhaust fluid and contamination monitoring to prevent crystal deposits and costly emissions failures. Warranty Protection Strategies for Duramax Owners Getting smart about warranty coverage can save you a lot of money down the road. GM gives you a bumper-to-bumper warranty for three years or 36,000 miles, plus a powertrain warranty covering critical engine, transmission, and drive components for five years or 60,000 miles. The catch is that you've got to stick to the factory service schedule. If you skip Duramax engine maintenance, you might find yourself paying for repairs that should've been covered. The parts you choose matter too. Original equipment manufacturer (OEM) parts typically cost 50%-100% more than aftermarket options, but they fit perfectly and reduce installation headaches. More importantly, factory parts come backed by GM's warranty, giving you coverage if something fails. Aftermarket parts, on the other hand, have unreliable warranty protection and often don't fit correctly without modifications. Using authorized GMC service centers and keeping detailed records gives you the paper trail you'll need for warranty claims while protecting your truck's resale value. Common Duramax Maintenance Mistakes That Reduce Longevity The Duramax oil change cost may tempt you to stretch change intervals too far, but this can be more expensive in the long run. Though Duramax engines can go 10,000 miles between changes, professionals recommend 5,000-mile intervals for trucks enduring towing, hauling, or tough conditions. Each Duramax generation has unique issues worth knowing about. For example, the LB7 (2001-2004) has weak injectors that are hidden under the valve covers, which complicates repairs when they fail, while LML engines (2011-2016) often have turbo troubles and emissions problems affecting DEF components. Warning Signs Your Duramax Needs Immediate Attention If your truck has starting troubles, especially in cold weather, you might have fuel delivery or glow plug problems that require prompt attention. A tiny puff of smoke from your exhaust under a heavy load is normal, but constant black smoke signals fuel-air mixture issues. If you notice your fuel economy tanking, it could indicate injector problems or a clogged air filter. These seemingly minor symptoms can quickly become warranty-voiding repairs if ignored. Pay close attention to specific trouble codes that demand immediate action, such as P0087 (Low Fuel Rail Pressure), P20BA (DEF Heater Fault), and P0335 (Crankshaft Position Sensor Error). These diagnostic codes can cause no-starts or put your truck in limp mode. CP4 pump failures will show clear warning signs, such as hard starting and power loss under load. Dashboard warning lights, knocking sounds, rattles, or any performance changes indicate that it's time to call the professionals. With diesel engines, seemingly small problems can escalate into costly repairs faster than you'd think. Keep Your Duramax Running Strong With Expert Service Factory-trained GMC technicians know Duramax engines inside and out and only use the correct fluids and parts for your vehicle. They follow GMC's guidelines by using genuine OEM components, which is vital for complex diesel emission systems and generation-specific needs. Professional service guarantees proper diagnosis and prevents warranty nightmares from non-dealer work. Maintenance protects your investment, so don't wait until trouble starts. At Meadowland GMC, our technicians have the specialized training your truck deserves. Visit us or phone our service team to protect your GMC with expert care. We'll help you keep your Duramax pulling strong for miles to come. Images from gmc.com

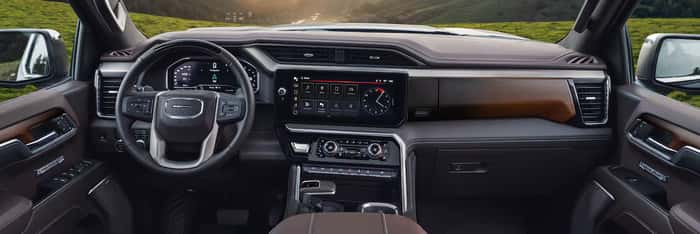
Interior of the 2025 GMC Sierra 1500 Denali

How To Reset System Bluetooth on the GMC Sierra Denali

Car buyers once focused solely on gas mileage, power, and performance. Today, at Meadowland GMC of Carmel, New York, our sales team probably spends just as much time highlighting advanced onboard connectivity features. One of the items we get asked about most on the GMC Sierra Denali is the Bluetooth system. This wireless technology enables devices to communicate with each other over short distances, providing drivers with easy access to hands-free calling and easy streaming of audio from podcasts, playlists, and the radio. From time to time, the Bluetooth system will go offline, so we've put together this guide explaining how to reset system Bluetooth on the GMC Sierra Denali. more SCHEDULE SERVICE SERVICE CENTER CALL US TODAY! Why You May Need To Reset Bluetooth on Your GMC Sierra Denali Software technology sometimes seems like it has a mind of its own, so it's not always apparent exactly what knocks the Bluetooth system offline in your GMC Sierra Denali. Common reasons for your GMC's Bluetooth not working include outdated software, interrupted connections, or interference from other electronic devices. These problems may result in unresponsive touch screens, frequent disconnects, crackling during calls, or having no audio at all. Problems Specific to Paired Devices Sometimes, you may have a problem with your GMC's Bluetooth not pairing. This might result from device incompatibility, interference with other wireless signals, errors in the data exchange, low battery levels, software bugs, or other items. Pairing is a process that's a little like exchanging contact information with someone you know. Your phone and the infotainment system trade secure codes, including a security key. Those codes are saved on both sides to allow for automatic reconnections without having to go through the re-pairing process again. Other common issues include having too many paired devices, devices being out of range, mismatched Bluetooth profiles, system overloads, or security restrictions. Performing a reset can give you a fresh start by clearing any bugs and giving the system the opportunity to restart. Step-By-Step Guide to Resetting Bluetooth A manual reset might be all you need to fix the issue — no dealership visit required. Follow these steps in our guide on how to reset the system Bluetooth on your GMC Sierra Denali and it'll be back online again in no time. Preparing To Reset: Preliminary Steps Start by checking for software updates — new versions can sometimes cause pairing issues. Downloading the latest update on your phone ensures Bluetooth is fully enabled and helps rule out interference from other devices. Next, tackle the easy fixes first. Make sure you turn Bluetooth on for both your vehicle and smartphone, and turn off other nearby Bluetooth devices that could be causing conflicts. Deleting Paired Devices From Your GMC Sierra Denali Clearing out old connections is a critical step in our guide on how to reset system Bluetooth on the GMC Sierra Denali. This involves navigating menus on both the GMC Sierra's infotainment system and your phone. On your infotainment system, navigate to the home screen and select settings. Then go to Bluetooth or phone settings, where you can view and delete previously paired devices individually. On your phone, open the Bluetooth settings and locate your vehicle's name in the list of paired devices. Select "Delete" or "Forget This Connection" to clear the existing pairing. Before reconnecting, GMC recommends restarting the infotainment system. Turn off the vehicle, open and close the driver's door to fully power it down, and wait two minutes before restarting. Reconnecting Your Smartphone Now, it's time to repair your phone with the vehicle. Follow these crucial steps to finalize the update: Turn on the ignition with the vehicle in Park. Tap the phone icon on the infotainment touch screen. Select "Add Phone" or "Connect Phone." Go to Bluetooth settings on your phone and select your vehicle. Confirm that the code displayed on your phone matches the one on the infotainment screen, then complete the pairing. That's all there is to it. The Bluetooth connection in your GMC Sierra Denali should now be reset and working properly. Test the connection by accessing one of your playlists or opening one of your apps. If you're unsuccessful, follow the steps to reconnect once more. Keeping your GMC Sierra Denali's Bluetooth system running smoothly requires occasional maintenance. Regular checks can help prevent connection issues before they arise, ensuring seamless integration between your vehicle and your devices. Regular Maintenance and Checks for Optimal Functioning As with every aspect of your car, regular maintenance can help you avoid problems when you can least afford them. For instance, it's a smart idea to check regularly for software updates on both the Sierra Denali's infotainment system and your smartphone. These are often released without fanfare with the goal of improving compatibility, fixing bugs, and triggering enhanced performance. It's also a good idea to clear unused Bluetooth pairs from both the infotainment system and smartphone and to restart both the infotainment system and your mobile phone on occasion. This can help reduce the risk of minor problems turning into major ones. Also, be aware of nearby common sources of interference that may get in the way of Bluetooth signals. If these are something you can control, you may want to relocate the sources of interference. Following these procedures will help you minimize disruptions and maximize the utility of the Bluetooth connections in your vehicle, keeping your mobile phone and its many apps properly synchronized when you need them. Visit Our Service Center at Meadowland GMC Today Purchasing a vehicle is a major investment. The certified technicians at Meadowland GMC of Carmel, New York, want to help you keep it on the road for as long as possible. With extensive experience in all GMC models, our team handles everything from oil changes and brake checks to powertrain and drivetrain repairs. We can help remind you when it's time for regular maintenance intervals, especially for oil changes. We welcome you into the Meadowland GMC family and look forward to providing you with the utmost in customer services. Call us or contact our staff online to make an appointment. Image from gmc.com

Man on phone next to GMC yukon

GMC Maintenance Schedule: Optimize Your Vehicle's Performance and Longevity

Regular maintenance is essential for keeping your GMC vehicle running at its best. Following GMC's recommended service schedule helps prevent costly repairs, maintains warranty coverage, and extends your vehicle's life span. Your GMC should receive service every 7,500 miles or once yearly, whichever comes first. This comprehensive guide covers everything you need to know about maintaining your vehicle, including the GMC service schedule and model-specific requirements. more SERVICE CENTER SCHEDULE SERVICE CALL US TODAY! General Recommendations for All Models All GMC models require consistent maintenance to perform reliably. Regular oil changes using the manufacturer-specified oil type are fundamental to engine health. Tire rotations and pressure checks help ensure even wear and optimal fuel efficiency. The brake system needs regular inspections to maintain safety and performance. Routine maintenance also includes checking all fluid levels: coolant, brake fluid, and power steering fluid. The air filter should be replaced according to the maintenance schedule, while the battery needs regular inspections to prevent unexpected failures. Safety inspections and checking the belts and hoses for wear help identify potential issues before they become serious problems. Regular leak inspections and proper wiper blade maintenance are essential for basic GMC upkeep. These tasks help prevent serious issues and ensure smooth vehicle operation. Detailed Breakdown by Mileage Intervals At 7,500 miles or 12 months, your GMC needs an oil and filter change, tire rotation, brake pad inspection, and engine air filter checks. The 22,500-mile service adds several essential tasks. Beyond the standard 7,500-mile maintenance items, technicians will replace the passenger cabin air filter and inspect the brake system more thoroughly. At 45,000 miles, your GMC requires more comprehensive service, including oil and filter changes, tire rotation, and cabin air filter replacement. Technicians will inspect the evaporative control system, replace the engine air cleaner filter, and check the brake and clutch fluid levels. Four-wheel-drive vehicles need transfer case fluid changes at this interval. The service also includes inspecting the spark plugs and wires. The 150,000-mile service involves significant maintenance items. The cooling system requires drainage and fresh coolant. Technicians will thoroughly inspect the condition of all accessory drive belts to prevent unexpected failures. Model-Specific Schedules Different GMC models have specific maintenance requirements based on their design and use. The GMC Sierra, with its powerful engines and towing capabilities, may need more frequent fluid checks and changes when used for heavy pulling. The GMC Terrain and Acadia, popular family vehicles, require regular attention to their advanced safety systems and comfort features. The GMC Yukon, with its larger engine and sophisticated features, has unique maintenance needs related to its size and complexity. Each model's maintenance schedule considers engine type, drivetrain configuration, and typical use patterns. While basic maintenance tasks remain similar across the GMC lineup, specific requirements vary by model year and features. Your owner's manual provides detailed information for your particular vehicle. Benefits of Adhering to GMC's Maintenance Schedule Following GMC's maintenance recommendations delivers multiple benefits: Your vehicle will perform better and use fuel more efficiently. Regular maintenance significantly extends your GMC's longevity and helps maintain its resale value. Proper maintenance reduces the likelihood of unexpected breakdowns and expensive repairs. Safety improves with regular maintenance as technicians can spot and address potential issues early. Following the recommended service schedule validates your warranty, protecting your investment. The Role of Warranty in Maintenance — What's Covered vs. Out-Of-Pocket Expenses A warranty covers defects or damage from regular use that affect safety, reliability, or roadworthiness within the specified coverage period, excluding normal wear and tear. GMC offers several warranty protection plans. GMC offers a bumper-to-bumper limited warranty for three years or 36,000 miles. This warranty covers parts and labor for repairs resulting from material or quality defects. It includes tire defects unrelated to normal wear and provides towing to the nearest dealer for warranty repairs. It doesn't cover routine maintenance, everyday wear, or damage caused by accidents, misuse, or modifications. The powertrain limited warranty covers essential engine, transmission, and drive system components for up to five years or 60,000 miles. It excludes sensors, wiring, radiators, hoses, and coolant. Corrosion protection lasts three years or 36,000 miles. Rust-through protection continues for six years or 100,000 miles, covering all body and sheet metal components. While warranty coverage is comprehensive, routine maintenance typically is your responsibility. However, GMC offers additional protection plans in addition to the limited warranty, which includes multiple coverage options. Tips for GMC Owners on Maintenance Best Practices Maintaining detailed service records helps track your vehicle's maintenance history and supports warranty claims. Pay attention to dashboard warning lights and unusual sounds, which often signal developing problems. Using genuine GMC parts helps maintain your vehicle's performance and reliability. Consider seasonal maintenance needs, such as checking your battery before winter or ensuring proper coolant levels for summer. Building a relationship with a trusted GMC service center ensures consistent, quality care for your vehicle. DIY Maintenance Tips for Simple Tasks You can perform several maintenance tasks at home: Level checks for oil, coolant, and windshield washer fluid Proper tire pressure maintenance Windshield wiper inspections and replacements Air filter inspections and battery connection checks Always consult your owner's manual for proper procedures and specifications before attempting any maintenance task. Signs It's Time for Professional Service Watch for these warning signs indicating the need for professional service: Unusual engine noises, such as knocking or ticking Vibrations while driving Decreased fuel efficiency Difficulty starting the vehicle Illuminated dashboard warning lights Unusual odors, particularly burning smells or exhaust odors in the cabin Fluid leaks under your vehicle Keep Your GMC in Top Condition with Meadowland GMC Our Meadowland GMC dealership in Carmel, New York, offers comprehensive maintenance and repair services. Our certified technicians adhere to GMC service plans, which include oil changes and tire rotations, as well as advanced diagnostic and repair services. We use genuine GMC parts to maintain your vehicle's performance and reliability. Schedule your next maintenance today, or visit our Meadowland GMC service center and take advantage of our special offers. Our certified technicians are ready to provide the expert care your GMC deserves. Image from gmc.com

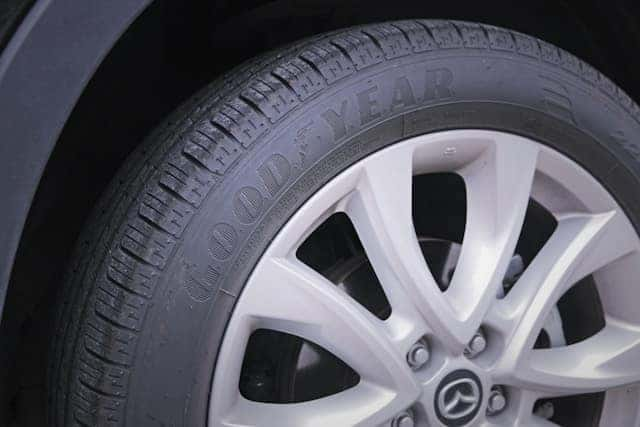
a close up of a tire on a car

How Often Should I Replace My Tires?

Ensuring that your vehicle's tires are in good condition is important for safety and performance on the road. But how often should you replace the tires? In this guide, our team at Meadowland GMC will explore the signs of tire wear, how to maintain your tires, and how often to replace them to keep your car running smoothly. more SCHEDULE SERVICE SERVICE CENTER CALL US TODAY! a close up of a tire on a car by Tristan Beischel @Autoily.com is licensed with Unsplash License The Importance of Regular Tire Checks Regular tire checks are important to ensure your tires are performing as they should. These inspections help catch potential issues before they escalate, such as low tread depth, uneven wear, or punctures. Ideally, you should check your tires once a month and before long road trips. Keeping an eye on the condition of your tires could save you from a sudden blowout, which could be dangerous on the road. How To Determine if You Need New Tires Knowing when to replace tires depends on several factors, including tread wear, age, and mileage. While many people focus on how much tread remains, tire age and overall condition are equally important. Tread Depth: The Critical Indicator Tread depth is one of the most reliable indicators of when to change tires. Tires are considered unsafe and should be replaced once the tread wears down to 2/32 of an inch. An easy way to test this is with a penny. Put a penny into the tread groove with Lincoln's head facing down. If you can see the top of his head, your tire tread is too low, and it's time for new tires. Age Matters: How Old Are Your Tires? Even if your tires have adequate tread, you should still consider their age. Tires with very little mileage still shouldn't be used if they're over 10 years old. Rubber degrades over time, and old tires are more prone to failure. If your tires are over 6 years old, you should inspect them regularly. Once they hit the 10-year mark, it's time to replace them, regardless of how much tread is left. Mileage Milestones for Tire Replacement Tire mileage is another key factor. On average, tires last between 36,000 and 75,000 miles, depending on the type of tire and your driving conditions. Factory-installed tires often wear out after around 30,000 miles. High-quality replacement tires typically offer a life span of 50,000 miles, but checking your tires' performance regularly is important. Signs of Wear and Damage There are other signs that indicate it may be time to replace your tires. These include: Bulges or blisters on the sidewall: This indicates potential weak spots in the tire that can lead to a blowout. Excessive vibration: If you notice increased vibration while driving, it could be a sign of tire damage or alignment issues. Uneven wear: This could signal a need for a tire rotation, alignment, or replacement. External Factors Affecting Tire Longevity Several external factors can also affect how long your tires last. Your driving habits, typical road conditions, and climate all play a role in tire wear. Driving aggressively can shorten the life span of your tires. If you drive frequently on rough roads, over long distances, or in extreme weather conditions, you may need to replace your tires more often. Maintaining Your Tires To Extend Their Life Proper maintenance can significantly extend the life of your tires. Here are some tips: Rotate tires regularly: Rotate your tires every 5,000 to 8,000 miles to ensure even wear. Keep tires inflated: Check your tire pressure at least once a month and maintain the manufacturer's recommended psi. Inspect for damage: Regularly check for nails, cracks, or other damage that could compromise tire safety. Alignments, Balancing, and Other Essential Services In addition to regular tire maintenance, having your wheels aligned and balanced periodically is essential. Misaligned or imbalanced tires can wear unevenly and prematurely. If you notice that your car pulls to one side or you feel a wobble in the steering wheel, it might be time to schedule a wheel alignment or balancing service. Tire Replacement FAQ Below, you can find answers to some common questions about replacing your tires. How Often Should Tires Be Changed? Most tires last around six to 10 years or between 36,000 and 75,000 miles, depending on how well you maintain them. Generally, you should inspect your tires regularly and replace them when you notice significant wear or after about six years, even if they still look fine. For example, tires can harden with age, reducing their ability to grip the road effectively. How To Tell if Tires Need To Be Replaced? A few clear signs indicate it's time to replace your tires, including low tread depth, vibrations while driving, excessive or uneven wear, and visible damage such as bulges, cuts, or cracks. If you experience any of these issues, it's essential to have your tires checked and replaced as needed. At What Tread Depth Should Tires Be Replaced? Tires should be replaced when the tread depth reaches 2/32 of an inch. You can measure this using a tread depth gauge or by performing the penny test. Some tires have built-in wear indicators, which are small, raised sections in the tread grooves. When the tread wears down to the level of these indicators, it's time for new tires. Do I Have To Replace All 4 Tires? For all-wheel-drive vehicles, it's generally recommended to replace all four tires at once. This is because all-wheel-drive systems rely on equal traction and tire size on all four wheels to function properly. Replacing only one or two tires can cause stress on the drivetrain and affect handling, potentially leading to long-term damage. For front- or rear-wheel-drive vehicles, replacing just two tires at a time may be acceptable, but always ensure that the new tires are installed on the rear axle for better stability. Visit Our Service Center at Meadowland GMC Today Regular tire maintenance and timely replacements are key for ensuring your vehicle's safety and longevity. If you're unsure whether it's time to replace your tires, stop by our Meadowland, New York, service center for an expert opinion. Our certified technicians can inspect your tires, perform any necessary services, and help you find the perfect replacements to keep you driving safely. Contact Meadowland GMC today to schedule a service.

Hummer EV Pickup parked in grass

Understanding Your Hummer's Dashboard Warning Lights

As a Hummer owner, it's crucial to understand the various warning lights that may appear on your vehicle's dashboard. These lights are essential indicators of vehicle health and can alert you to potential issues requiring immediate attention. In this comprehensive guide, we'll explore the most common Hummer warning lights, their meanings, and the steps to take when they illuminate. more Image from gmc.com SEARCH NEW INVENTORY NEW GMC HUMMER EV INVENTORY CALL US TODAY! Guide to Symbols: Decoding the Warning Lights Hummer dashboards feature a variety of warning lights, each with a unique symbol and meaning. Here are examples and what it means when they illuminate: Service vehicle soon light (propulsion system failure): Indicates a problem with the vehicle's electric drive motors or related components. If this light appears, you must have your Hummer inspected by a professional as soon as possible. Charging system light: Signifies an issue with your Hummer's electrical charging system, which keeps the battery charged while driving and during charging sessions. This could be due to a faulty alternator, a wiring problem, or a battery nearing the end of its life span. Brake system warning light: Illuminates when there's a problem with your Hummer's braking components. This is a serious safety concern, so avoid driving the vehicle until you resolve the issue. Four-wheel-drive (4WD) light: Lets you know when your Hummer's 4WD system is engaged, providing enhanced traction and stability in various driving conditions. Cruise control indicator light: Indicates when the cruise control feature is active, allowing you to maintain a steady speed without keeping your foot on the accelerator pedal. Other common dashboard warning lights you may encounter include the check engine light, oil pressure light, and tire pressure monitoring system light. Each of these requires prompt attention to ensure your Hummer's optimal performance and safety. Troubleshooting Tips: Quick Fixes and Potential Causes Here are some troubleshooting tips for common Hummer warning lights. Service Vehicle Soon (Propulsion System Failure) Light Potential causes: Failed motor controller, wiring issues, or other electrical components. Diagnostic procedures and quick fixes: Use a diagnostic scan tool to retrieve trouble codes and identify the root cause. Some issues may require a software update or replacement of electrical components. Charging System Light Potential causes: Faulty alternator, wiring problems, or a failing battery. Diagnostic procedures and quick fixes: Test the battery and alternator and inspect the charging system for any visible damage or loose connections. A replacement of the alternator or battery may be necessary. Brake System Warning Light Potential causes: Low brake fluid, worn brake pads, or a malfunctioning ABS. Diagnostic procedures and quick fixes: Check the brake fluid level and top it off if necessary. Inspect the brake pads for excessive wear. If the issue persists, you need a professional brake system inspection. When troubleshooting any warning light, always prioritize safety. If you're unsure about a particular issue or lack the necessary tools and expertise, it's best to seek the help of a certified Hummer technician. Professional Advice: When To Seek Expert Help While some warning lights may indicate minor issues you can resolve quickly, others demand immediate professional attention. Ignoring persistent warning lights can lead to more severe problems, compromising your safety and potentially requiring expensive repairs. Our Meadowland GMC team of certified Hummer technicians has the knowledge, tools, and expertise to accurately diagnose and repair any issue causing a warning light to illuminate. We understand the intricacies of Hummers and are committed to providing top-notch service to ensure your vehicle's optimal performance and longevity. When you bring your Hummer to us, you can trust that our technicians will thoroughly inspect it and identify the root cause of the warning light. They'll also provide a detailed explanation of the necessary repairs. We use state-of-the-art diagnostic equipment and genuine GMC parts to ensure the highest quality of service. Preventive Maintenance: Keeping Your Hummer in Top Shape Regular preventive maintenance is key to minimizing the occurrence of warning lights and keeping your Hummer running smoothly. By following the recommended maintenance schedule for your specific Hummer model, you can catch potential issues early and prevent them from escalating into more severe problems. We offer comprehensive maintenance services tailored to your Hummer's unique needs and rotating service specials. Some of our competitively priced services include oil changes, tire rotations, and brake inspections. By entrusting your vehicle to our skilled technicians, you can enjoy peace of mind knowing your Hummer is receiving the best possible care. In addition to preventing warning lights from appearing, regular maintenance can also improve your Hummer's fuel efficiency, extend its life span, and maintain its resale value. Our team will work with you to develop a personalized maintenance plan that fits your driving habits and budget. Case Studies: Real-Life Consequences Let's consider a couple of real-life scenarios to emphasize the importance of addressing warning lights promptly. In one case, a Hummer owner noticed the propulsion system failure light illuminating but chose to ignore it. After a few days of continued driving, the vehicle suddenly lost power on the road. The owner had to have it towed to a service center, where technicians discovered that the electric drive motor had failed due to the prolonged neglect of the warning light. The repair cost thousands of dollars and left the owner without their vehicle for several weeks. In another instance, a Hummer owner noticed the brake system warning light was on and immediately brought their vehicle to our dealership. Our technicians quickly diagnosed the issue as low brake fluid and a worn brake pad. By promptly addressing the problem, the owner avoided a potentially dangerous situation and more extensive repairs. These case studies underscore the value of timely intervention regarding warning lights. By being proactive and seeking professional help from a trusted service center, you can avoid costly repairs and ensure your vehicle's safety and reliability. Don't Ignore the Signs: Schedule Your Hummer Service Today Don't wait to act if you're in the Meadowland, New York, area and notice a warning light illuminating your dashboard. Bring your vehicle to us, and our expert technicians will diagnose and resolve any issues with precision and care to keep your Hummer in top condition. Call our service center at 845-228-8465 to schedule an appointment or use our convenient online scheduling tool.

A tire stacked in a pile to be used in a tire rotation

How Often Should You Rotate Tires?

Tire rotation is an important part of vehicle maintenance that helps ensure optimal performance, safety, and longevity. Regularly rotating your tires can extend their life, improve fuel efficiency, and maintain even tread wear. We at Meadowland GMC in Meadowland, New York, have compiled this comprehensive guide to inform you about the importance of tire rotation, recommended intervals, rotation patterns, and the impact of tire wear on your vehicle's performance. Use our step-by-step guide if you're interested in rotating your tires at home. more SCHEDULE SERVICE SERVICE CENTER CALL US TODAY! The Importance of Regular Tire Rotation Regular tire rotation offers numerous benefits for your vehicle and your wallet. By rotating your tires at the recommended intervals, you can significantly extend their life span, saving you money on premature replacements. Evenly worn tires also improve gas mileage, as they maintain optimal contact with the road surface, reduce rolling resistance, and increase fuel efficiency. Proper tire rotation also enhances your vehicle's handling and stability. When all four tires wear evenly, your car or truck will respond more predictably to steering inputs and maintain better traction in various road conditions. This is particularly important in emergencies, such as sudden braking or evasive maneuvers, where consistent tire performance can make a critical difference. Furthermore, regular tire rotation helps prevent uneven tire wear. Uneven wear can cause potential safety issues, such as vibrations, pulling to one side, and increased road noise, negatively impacting your driving experience. By keeping your tires wearing evenly, you'll enjoy a smoother, more comfortable ride and avoid the need for premature tire replacement. Recommended Tire Rotation Intervals The general recommendation for tire rotation is every 5,000 to 7,500 miles or every six to 12 months, whichever comes first. However, it's best to check your vehicle's owner's manual for the manufacturer's specific recommendations, as these can vary based on factors such as vehicle type, tire type, and driving conditions. Tire Rotation Patterns and Techniques Your tire rotation pattern will depend on your vehicle's drivetrain configuration. For front-wheel-drive vehicles, the most common rotation pattern is to move the front tires straight back to the rear axle and cross the rear tires to the front axle. This pattern helps ensure that each tire spends time on the front and rear axles, promoting even wear. Rear-wheel-drive vehicles typically follow a different rotation pattern. In this case, the rear tires are moved straight forward to the front axle, while the front tires are crossed to the rear axle. For all-wheel-drive and four-wheel-drive vehicles, the rotation pattern may vary depending on the manufacturer's recommendations. Some common patterns include moving the front tires to the rear on the same side and crossing the rear tires to the front. A crisscross pattern is also possible, where the left front tire moves to the right rear, the right front to the left rear, and so on. Refer to your owner's manual for the specific rotation pattern recommended for your vehicle. If you're rotating your tires at home, make sure to use a jack and jack stands to lift and support your vehicle securely. Loosen the lug nuts before lifting the vehicle, and then remove the tires one at a time, rotating them according to the appropriate pattern. Torque the lug nuts to the manufacturer's specified value using a torque wrench to ensure proper installation. How Tire Wear Affects Your Vehicle's Performance Uneven tire wear can significantly impact your vehicle's performance, particularly in terms of braking, handling, and overall safety. When tires wear unevenly, they may have reduced traction, especially in adverse weather conditions, such as rain, snow, or ice. This can lead to longer stopping distances, reduced cornering stability, and an increased risk of hydroplaning or sliding. Unevenly worn tires can cause your vehicle to pull to one side while driving, requiring constant steering corrections to maintain a straight path. In extreme cases, uneven tire wear can even lead to tire failure, such as blowouts. These sudden and often catastrophic events can cause you to lose control of your vehicle, putting yourself, your passengers, and other road users at risk. DIY Tire Rotation If you prefer to rotate your tires at home, there are some proper steps and safety precautions that you should follow. Before beginning, gather the necessary tools, which typically include a jack, jack stands, lug wrench, and a torque wrench. Work on a level surface and engage your vehicle's parking brake for added stability. Start by loosening the lug nuts on all four tires while the vehicle is still on the ground. This will make it easier to remove the tires once the vehicle is lifted. Next, place the jack under the designated jacking point and carefully lift the vehicle until the tires are off the ground. Place the jack stands under the appropriate support points to keep the car elevated. Remove the tires one at a time, starting with the front tires. Place each tire in its new position according to the pattern specified in your owners manual. Hand-tighten the lug nuts to keep the tires in place while you lower the vehicle back to the ground. Once all four tires are rotated and the vehicle is back on the ground, use the torque wrench to tighten the lug nuts to the manufacturer's specified torque value. Throughout the tire rotation process, prioritize safety. Always use jack stands to support the vehicle, and never work underneath a vehicle that's only supported by a jack. If you're unsure about any step or encounter difficulty, don't hesitate to seek professional assistance to avoid potential injuries or damage to your vehicle. Schedule Your Next Tire Rotation at Meadowland GMC At Meadowland GMC, we understand the importance of regular tire rotation for maintaining your vehicle's performance, safety, and longevity. Our state-of-the-art service center employs experienced technicians dedicated to providing exceptional care for your car. We offer the benefit of online scheduling to make sure getting any service, including tire rotations, is as seamless as possible. When you schedule a tire rotation at Meadowland GMC, you can trust that your vehicle is in capable hands. We also want you to save, so please check out the service specials we offer. Contact us if you have any questions. black and white shoe on white surface by Jaye Haych is licensed with Unsplash License

Air Filter Replacement

How Often Should You Replace The Air Filter in your Car?

Whether you're driving long distances on a road trip or commuting daily, keeping clean air flowing in your vehicle is important. Your car's air filter is an essential workhorse, keeping your car's mechanics clean and clear while you drive it. Occasionally, an air filter change is necessary to keep your vehicle running and performing at its best. In this article, our Meadowland GMC service team explores the importance of car air filters, how often to replace them, and how to tell when it's time for a change. What Is an Air Filter? A car's air filter is a component that keeps pollutants such as dirt and dust out of the fresh air flowing into your vehicle. There are typically two types of these in a car: the engine air filter and the cabin air filter. These serve the same purpose for two different areas of the car. An engine air filter works with the air intake of your engine's internal combustion chamber, preventing dirt particles from causing damage to the engine and reducing your vehicle's emissions. Over time, this engine filter becomes clogged and needs changing to maintain your vehicle's performance and safety. The cabin air filter removes debris from the air that flows into your car's cabin, ensuring that the air you and your passengers breathe is clean. This makes the air breathable, odorless, and safe to be inhaled by anyone in the vehicle. Like the engine air filter, a cabin filter should be replaced periodically to remove contaminants. Otherwise, it will be ineffectual, and impurities will continue to affect the car's overall air quality. Keep your GMC vehicle comfortable for yourself and your passengers by changing your air filter regularly. Where Is the Air Filter? The location of a car's air filter varies between models and manufacturers, but they're generally located in very similar positions. A GMC vehicle's engine air filter is in a housing near the engine, which often looks like a small black box covered with a lid. You can access this housing with a screwdriver or Allen wrench and change the filter, which is a rectangular tray with papery layers of filter media. These filters are easy and affordable to replace since they're made of inexpensive materials. A GMC vehicle's cabin filter is in the interior of the car, usually behind the dashboard. The housing for the cabin filter is concealed and secured behind the glovebox. You can usually get to this section by loosening a screw and removing the glovebox. Once you have found the housing, you can see the cabin filter inside and easily remove it. Can I Do It Myself? Replacing your car's air filters is relatively easy and inexpensive, provided you know their location. Consult your GMC vehicle's owners manual to locate your model's engine and cabin air filters. Once you've located them, order air filters compatible with GMC vehicles to replace the existing ones. You can then replace them to keep fresh air circulating throughout your car. How Can I Tell When To Replace My GMC's Air Filters? While there's often no clear indication of when to change your air filter, some telltale signs and symptoms could show that replacing your air filter is a good idea. A dirty air filter prevents clean air from entering your car, so you may find that the air in the car is too warm, smells off, or is difficult to breathe. Engine overheating may also be a clear indication that your engine air filter needs replacing to help circulate cool air while the engine operates. Reduced acceleration power can also point to an issue with your engine filter. The quickest way to check if your air filters need replacing is to open the housing and visually check them. If the filters have a light layer of dirt and dust, they're probably fine, but if they're excessively dirty or have any holes in the fabric, you'll need to replace them immediately. How Often Should I Change My GMC's Air Filters? You should check your GMC vehicle's air filters whenever you begin to experience issues with your car's air quality or engine performance. If you find the filters dirty or damaged, remove them and replace them with new ones. Even if they look like they're in good condition, you should try to change them every 12,000 to 15,000 miles or at least once a year. If you frequently drive on dirty or dusty roads, consider changing them more often, as the wear on your filters will be more than average. What Happens if I Don't Replace My GMC Vehicle's Air Filters? If you don't regularly replace your vehicle's air filters, it can have a measurable impact on the air quality in your car. If you don't replace your cabin air filter, passenger air quality can decrease, leading to the cabin air becoming too warm and stuffy. A clogged engine air filter can affect the air quality inside the combustion chamber, decreasing your GMC's engine performance and fuel efficiency. It would be best to replace your air filters often to avoid these effects. Speak With Our Team at Meadowland GMC in Meadowland, New York If you're struggling to locate your air filters, would like advice on replacing them, or need help sourcing compatible parts, we at Meadowland GMC are happy to discuss your needs. If you're bringing in your vehicle for a service, we'd be happy to change your filters during the same job. Contact us online or call us at 845-225-8468 to talk to our customer service team, and we can connect you to an expert advisor to help you get what you're looking for.

Faulty Windshield Wipers

How to Take Off Windshield Wipers?

Do your windshield wipers leave behind streaks or debris, or have they scratched your windshield? Replacing your windshield wiper blades is a common part of routine vehicle maintenance. This not only protects your windshield; it also protects you by ensuring you have clear visibility when you're behind the wheel. Not sure how to remove your old wipers? We've put together this step-by-step guide to help you replace your wiper blades. Understanding How to Remove Your Windshield Wipers You might not think twice about the windshield wipers until they stop working, but they are important in keeping you safe on the Putnam County roads. Windshield wipers remove rain, snow, and debris from the windshield, providing a clear view of the road ahead. As the arms move back and forth, the attached blades remove water and particles from the windshield. When your wipers become less efficient, you need to replace them so you don't find yourself driving with an impaired view. In most cases, you'll only need to replace the blades, not the arms. You can find new blades for your vehicle at a certified dealership, such as Meadowland GMC, an automotive store, or online. You'll need to know the correct size to purchase, which you can find in your GMC owners manual. You can also choose what type of blade you want. You have several options, including: Traditional: These blades can work on a wide variety of vehicles, and they're usually the most cost-effective choice. Beam: For enhanced performance and durability, you can choose these curved blades. Winter: These wiper blades can work well during the winter since they're specially designed for ice and snow. Once you select a blade, it's time to replace your old windshield wipers with a new pair. Tools and Materials Needed Removing your wiper blades is a fairly easy job, but it still requires a few tools. Make sure you have the following items on hand before you begin: Towel or rags. New windshield wipers. A screwdriver. You may not need the screwdriver, depending on the type of wipers you currently have. If your wipers are dirty or muddy, you may also want to have a pair of gloves to wear. How To Take Off Your Windshield Wipers Follow these steps to remove your old wiper blades: Lift the Wipers Grip the wiper where the arm meets the blade and lift it up slowly. Once fully extended, both wipers should stay upright on their own. To be safe, place a towel or rag on the windshield so the wiper arms don't accidentally snap back down and damage the glass. Remove the Blades Check to see what type of blade your wipers have. The type of blade will determine how you remove it. Many wipers have a small tab or button near the spot where the arm meets the blade. Press that tab and slide the blade to remove it. Your wipers may have a pin connector at the end of the arm to hold the blade. If that's the case, use a screwdriver to lift the pin connector and release the tab. Then, pull the blade off the pin. If there are tabs on both sides of the wiper arm, hold those down as you slide the blade up to remove it. No matter what type of blade your wipers have, removing one at a time is a good idea. This way, you can check the old blade as you install the new one to ensure you're doing it correctly. Install the New Blades Once you've removed the blade, ensure the new one matches the old one. Then, attach the new blade to the arm using the same process you followed to remove the old one. Slide the blade until you hear a clicking noise, which means it's locked into place. Lower the arm back onto the windshield and repeat the process on the other wiper. Test the Blades Before patting yourself on the back, test the new blades to ensure they work correctly. Use windshield washer fluid or a garden hose and turn on the wipers. Whenever you change the wiper blades, it's also a good idea to check the washer fluid and top it off if you need more. Common Challenges and Troubleshooting If you've tried removing your wiper blades with no luck, ensure you're using the right technique. Some wiper blades have a pin mechanism that requires a screwdriver to disengage it. You may also have problems if you buy the wrong size blades for your vehicle. Check the owners manual or measure each blade before you go shopping to ensure you choose the correct size. If you have the right size but it doesn't fit, ensure you install it on the correct side. Some vehicles have different wiper lengths on the passenger and driver sides. If you still have problems, bring your vehicle to Meadowland GMC. Our team of certified technicians can quickly remove and install your new windshield wipers so you can get back on the road with better visibility. Maintaining Your Windshield Wipers Checking the windshield wipers should be routine in vehicle maintenance to keep your GMC running its best. In general, it's a good idea to change your wiper blades every six months. GMC also recommends replacing the blades if you notice these signs of wear: Streaking: If you see streaks left behind on the windshield, it's a good time to get new blades. Chattering: If the blade skips while operating, it's probably time to replace it. Worn rubber: Check the rubber insert for peeling edges, which can signal overuse. Split rubber: Cracks or splits in the rubber can indicate sun damage, causing a blade to need replacement. Bent arm: Accidentally knocking the wiper with an ice scraper or other object can bend the wiper frame; you may need to replace the arm, blade, or both. Get Your Windshield Wipers Replaced at Meadowland GMC Don't have time to learn how to remove your old wiper blades so you can replace them? No problem. At Meadowland GMC in Carmel, New York, we can handle all your vehicle service needs, from new wipers to oil changes to major repairs. Schedule a service appointment and let our technicians take care of this maintenance. Don't forget to check out our current service specials to see how you can save money on wiper blades. Have more questions about wiper replacements or our service department? Stop by or contact us today. Photo Credit: shallow focus photography of black vehicle wiper by Thibault Valjevac is licensed with Unsplash License

Brake Pad Replacement

How long do brake pads last?

The only thing separating you from disaster on the road are two thin pieces of friction material pressed against a rotor, spinning at high speeds. Your brake pads endure punishing forces every time you slow down your vehicle as they rapidly scrub off kinetic energy and momentum to bring you safely to a stop. Like an athlete constantly pushing their body to the limit, brake pads require proper care and maintenance to perform at their best. Overlooking simple steps, such as checking pad thickness and replacing worn pads, jeopardizes your vehicle's stopping power. Never underestimate the importance of your brake pads, and prioritize brake maintenance for your safety and that of others on the road. How Long Do Brake Pads Last? Brake pads typically last between 30,000 and 70,000 miles, but the frequency at which they need to be replaced depends on various factors, such as: Driving style and road conditions: Aggressive drivers facing frequent uphill and downhill gradients may need brake service after just 20,000 miles. However, those with a gentler approach, mainly driving on highways, can sometimes stretch up to 100,000 miles with the original pads. Vehicle type: Performance vehicles push the braking system to its limits. Still, thanks to technological advancements, premium pads on certain upscale models can achieve 90,000-100,000 miles. Environmental factors: Weather plays a significant role as well. Salted winter roads speed up corrosion, while summer heat leads to glazing — both accelerate brake wear. Materials used: Brake pads come in many types, such as organic, ceramic, and metallic. Some provide more extended life than others but with tradeoffs such as increased noise or reduced performance in cold weather. This multitude of factors significantly influences the life expectancy of a brake pad. Consequently, a fixed rule for replacement intervals can be misleading and potentially unsafe. Instead, regularly inspect your brake pads, leverage built-in wear indicators, and physically check the pad thickness every 5,000 miles. Types of Brake Pads As mentioned earlier, brake pad materials greatly influence their performance and longevity. Let's dive deeper into each type so you can understand when it's time to replace your pads: Organic pads: Made from rubber, glass, or carbon materials, these tend to be quieter and softer on rotors. However, they also wear out faster, especially in unfavorable conditions. Ceramic pads: These are made from a composite of ceramic, copper fibers, and nonferrous bonding agents. They provide excellent stopping power while quieter and more durable than organic pads. Semi-metallic pads: These contain materials such as steel, iron, copper, and graphite. They provide better heat dissipation but come with increased noise and rotor wear. Remember that proper maintenance is critical to ensuring optimal performance and longevity, regardless of your chosen type. Regular inspections can't be overstated, as catching and addressing issues early on can save you from costly repairs in the future. As always, consult your vehicle's owner's manual for specific recommendations and safety precautions before attempting brake system maintenance or repairs. Signs of Brake Pad Wear and Tear While it's useful to have a rough idea of how long your brake pads will last, recognizing common signs of wear and tear is crucial. It's worth mentioning that some symptoms may not be obvious at first glance, but they can still indicate that your pads need to be replaced: Squealing or grinding noises: Squeals come from tiny metal pieces called indicators that produce noise to alert you when your pads need changing. Grinding sounds mean the wear indicators have entirely rubbed off, exposing metal against metal. Unusual vibrations: Warped rotors cause brake pedal or steering wheel vibrations during braking. Unsurprisingly, this can indicate worn-down pads, as the remaining material can't dissipate heat fast enough. Indicator lights: Most modern cars have electronic brake pad wear sensors that monitor pad thickness. While these systems provide peace of mind, they aren't infallible, so visually inspecting the pads is always recommended. Reduced stopping power: Last but not least, reduced stopping power is a key indicator and the main reason you should never ignore your brakes. If it takes longer to come to a stop or requires more pedal pressure, it's time for new pads. Visible pad wear: Generally, if your brake pad thickness is around one-eighth of an inch (3 mm), it's time for a replacement. Regular visual inspections can help spot uneven or significant wear on each pad. Vehicle pulling to one side: Your car veering to one side under braking is a telltale sign of uneven brake pad wear, possibly due to a system malfunction or dirty brake fluid. An immediate brake system inspection is recommended to avert accidents and further damage. Unresponsive pedal: Before a pad wears out entirely, you can experience an unresponsive pedal that requires more pressure before the vehicle slows down. This indicates your pads are dangerously close to failure. How To Prolong the Life of Your Brake Pads While brake pads do have a limited life span, there are some measures you can take to increase their longevity: Be aware of traffic, and anticipate potential braking situations: By paying attention to surrounding cars, you can predict when to apply your brakes. Try to brake steadily and gradually rather than suddenly slamming them on, as this puts less strain on the brake pads. Avoid high-speed driving: Sudden braking at high speeds puts your brake pads under extra pressure, leading to faster wear and tear. Stick to the speed limits and maintain a steady pace. Accelerate gently: Heavy, sudden braking increases wear and tear on your brake pads. By accelerating gently and driving responsibly, you can reduce the risk of damage and contribute to a longer life span for your brake pads. Drive light: While you can't always avoid having passengers, you can unload anything in the vehicle that isn't required for a particular journey. Clear out the trunk, remove an unused roof rack, and do whatever you can to reduce the weight of your vehicle where possible. Schedule Brake Pad Service If you suspect your car's brake pads need inspection or replacement, don't delay scheduling a service appointment at Meadowland GMC in Carmel, New York. Procrastination can lead to further damage, compromising your vehicle's safety and creating more significant repair costs. We're also your premier destination for original equipment manufacturer parts, ensuring your car receives the best quality components. Our certified technicians have the expertise and state-of-the-art equipment to get you back on the road safely in no time. And if you're due for an oil change or tire rotation, we'll take care of that, too. Photo Credit: Passenger side brake put together by dave_7 is licensed with CC BY 2.0 DEED

Contact Us

Fill out this form below and we'll contact you shortly
*Required Fields